First Steps
Welcome to lumeforms
This documentation exists to ensure you get value out of lumeforms, and you can reference it anytime if you are feeling lost or stuck. This documentation will use an example project: a Vanta style compliance SaaS. Follow along but replace the details with your specific use case. It's recommended to also read the Use Cases and Best Practices page as well before you send your first forms. If you have any additional questions, feel free to reach out on the Discord or send us an email at any time.
1. Project Dashboard
You are now on the Project Dashboard. Projects act as folders, where inside your forms are stored.
- Create Project. Click Create Project and name it based on what you're collecting feedback for (e.g. a SaaS product, a YouTube channel, a Substack, etc.).


2. Form Dashboard
You are now on the Form Dashboard. Here, you can create or view individual forms within your project.
- Project Context. Click on the Project Context to add any relevant details about your project (e.g. company overview, target audience, product category, etc.). This context is fed to the ai first, helping it deliver better results. Better context provided will result in superior analysis. For this example, I will be providing a brief overview, audience, and how ComplyKit will use the feedback delivered.
- Create Form. Click Create Form and name it based on what you're collecting (e.g. video feedback, product survey, newsletter topics, etc.).


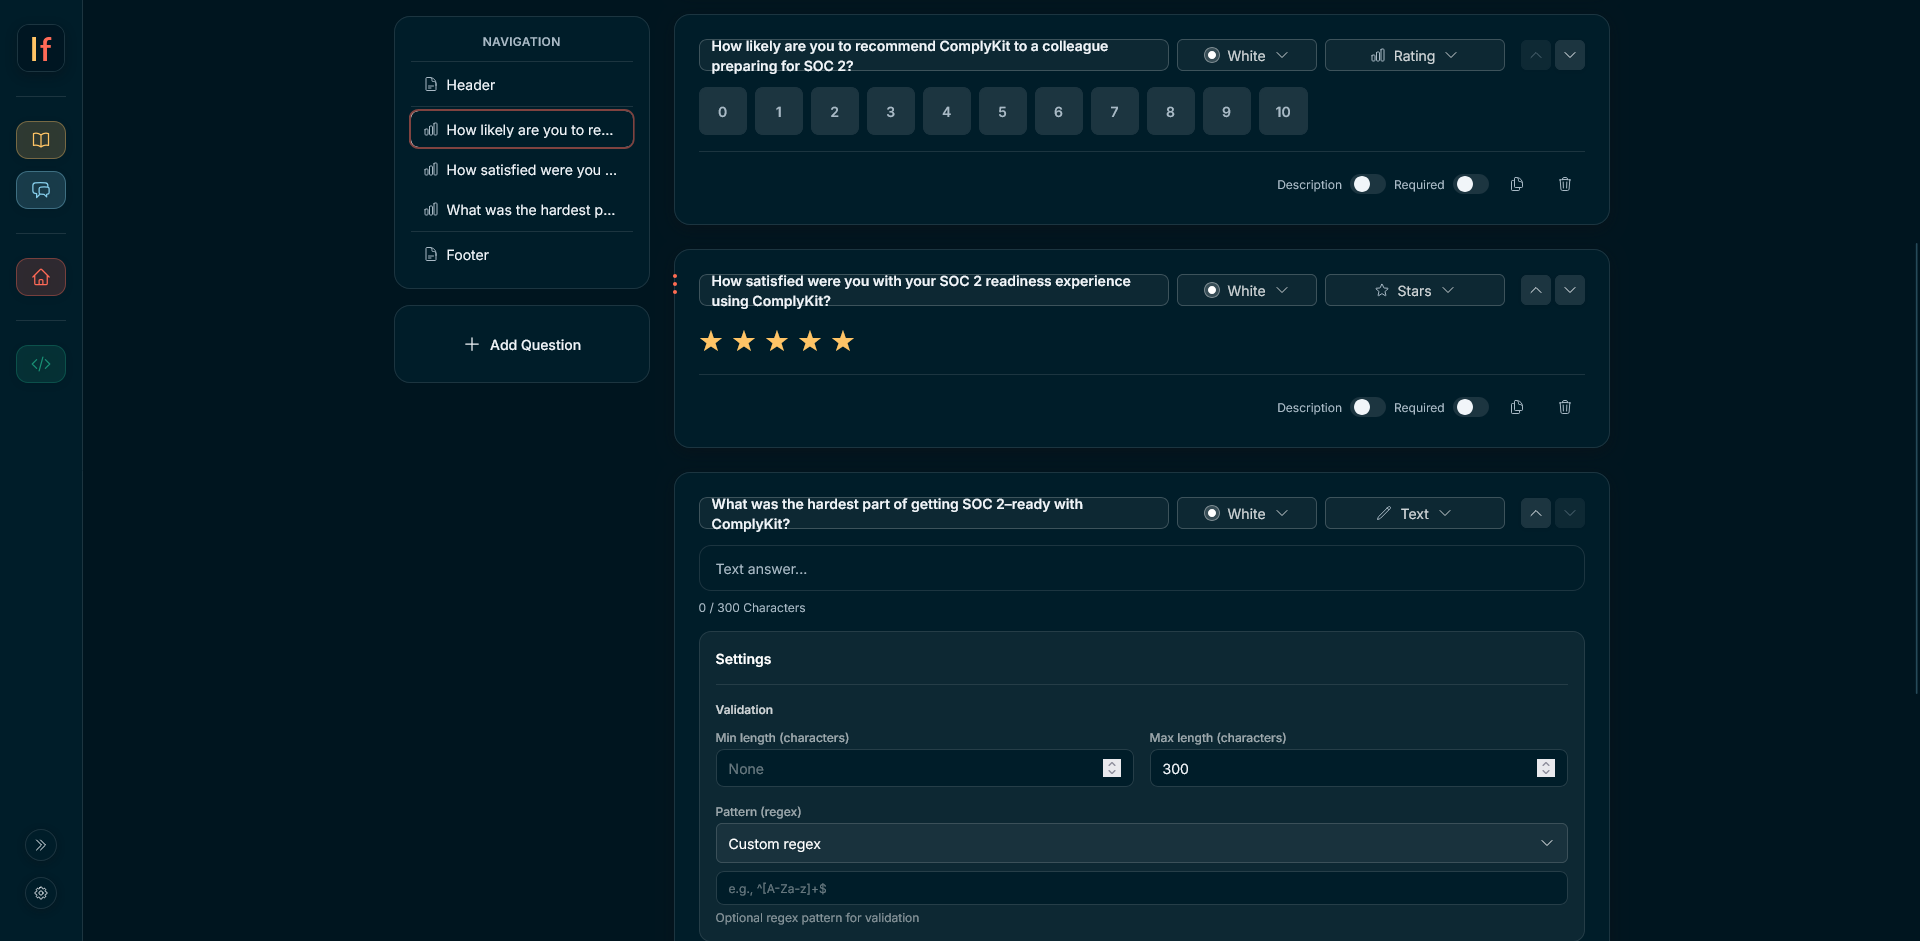
3. Form Builder
You are now in the Form Builder. Here you design your form, choose duration, and configure options.
- Build form. Click Add Question to add question blocks. Choose the type (e.g. Text, Multiple Choice, etc.), fill out the question and options, and mark required if needed.
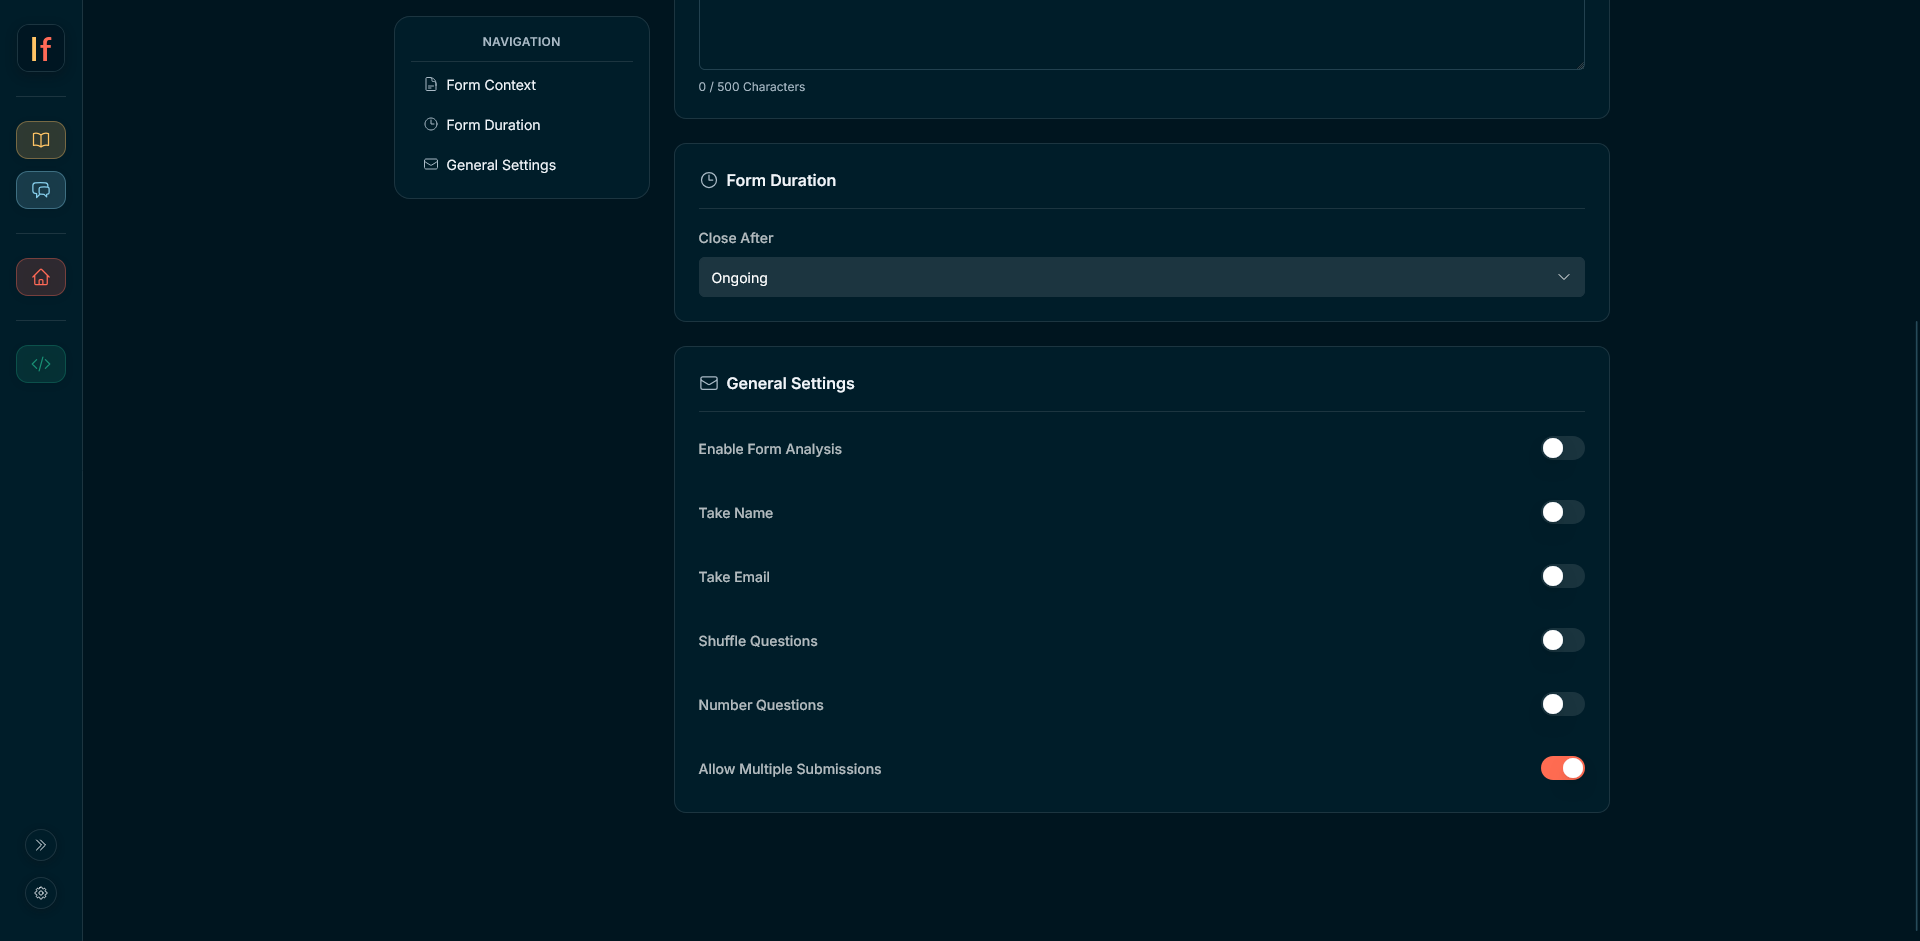
- Form Context. Within the configuration tab, you can add form context, which acts just like project context but only applies to this specific form. For this example, there was not any additional context I needed to add so I left it blank.
- Form duration. This will determine how long your form is open to collect responses. Options are one, three, and seven days. Form results will only be shown after the form has expired. Additionally, you are able to set a form to be Ongoing, which means the form never expires and analysis can be run whenever. Do not select this option unless your use case requires you to do so. In this example, I chose Ongoing because collecting input from clients is a continuous behavior and later I will be able to agregate the feedback.
- General Settings. Here, you can configure the settings of your form (Enable Form Analysis, Take Name, Shuffle Questions, etc.). Unless needed, it is recommended to leave these settings as is. Do not select Take Name or Take Email unless your use case requires you to do so.
4. Form Published
Congrats, your form is now published and ready to be shared. You can see what this example form looks like live: view the example form. Share your form whenever and wherever you'd like. After the responses are collected and the form is expired, you will be able to see your results. For this specific example, because I chose Ongoing for my duration, it bypassed the Form Still Open page (shown in second image) and sent me straight to results.


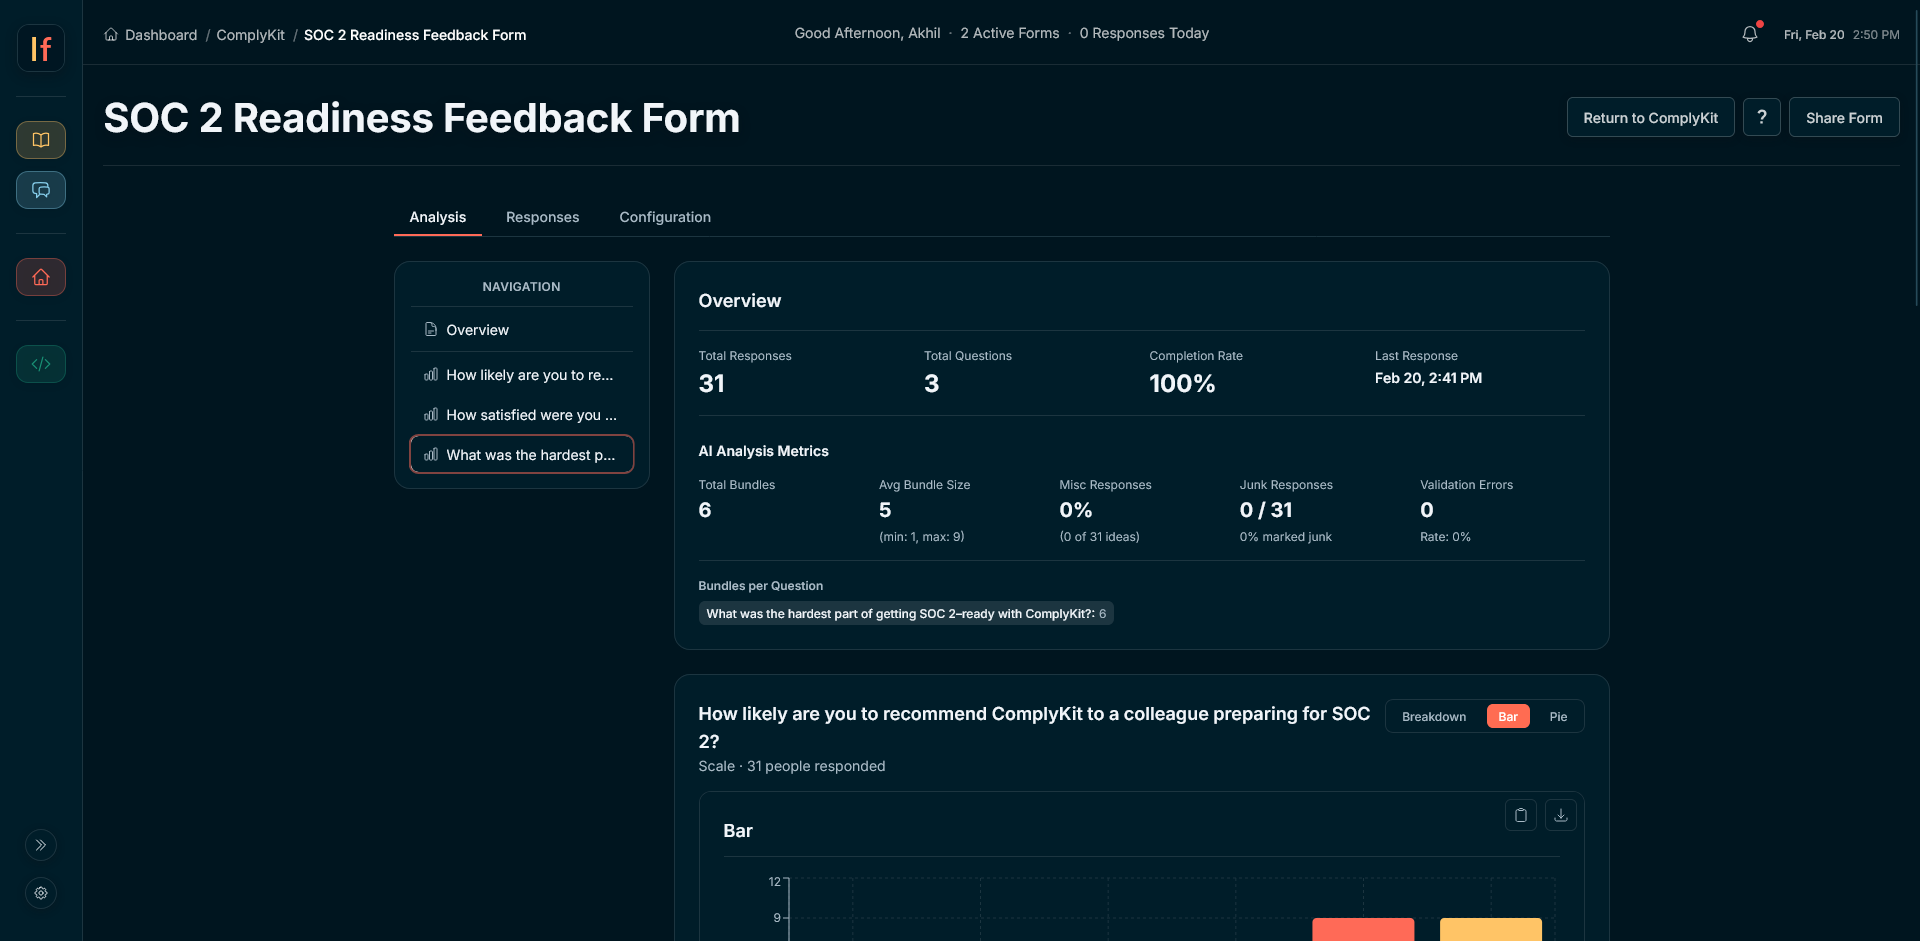
5. Form Analysis
Congrats, your form has expired and the results are in.
- View your results. Text responses can be viewed as ranked Sentiments, Actionable Insights, or Shuffled (with junk responses automatically removed). Every other response type can be viewed as a Breakdown, Pie, or Bar Chart.
- Individual Responses. Navigate to the Responses tab to read individual submissions from your responders.
- Configuration. Within Configuration, you can export your results, import data, adjust Project or Form Context, and rerun analysis.
- Take action. Use the analysis and actionable insights provided to improve or grow your business, or use what you learn to guide later decisions.


